Module 1: Welcome to OpenShift!
This lab guide is the F5 Advanced Labs for Red Hat OpenShift Container Platform (OCP). This lab guide and blueprint was created using OCP version 3.7. This lab provides a quick tour of the console to help you get familiar with the user interface along with some key terminology we will use in subsequent lab content.
Key Terms
We will be using the following terms throughout the workshop labs so here are some basic definitions you should be familiar with. And you’ll learn more terms along the way, but these are the basics to get you started.
- Container - Your software wrapped in a complete filesystem containing everything it needs to run
- Image - We are talking about Docker images; read-only and used to create containers
- Pod - One or more docker containers that run together
- Service - Provides a common DNS name to access a pod (or replicated set of pods)
- Project - A project is a group of services that are related logically (for this workshop we have setup your account to have access to just a single project)
- Deployment - an update to your application triggered by a image change or config change
- Build - The process of turning your source code into a runnable image
- BuildConfig - configuration data that determines how to manage your build
- Route - a labeled and DNS mapped network path to a service from outside OpenShift
- Master - The foreman of the OpenShift architecture, the master schedules operations, watches for problems, and orchestrates everything
- Node - Where the compute happens, your software is run on nodes
Step 1: Access the Win7 Jump box
Use the following username and password:
- username: user
- password: Student!Agility!
Note
Use the Send Text to Client option to paste the password.
- We are using RHEL in this blueprint
- We updated on all the nodes (ose-node1, ose-node2) the /etc/hosts file so that each node is reachable via its name
[root@ose-node01 ~]# cat /etc/hosts
127.0.0.1   localhost localhost.localdomain localhost4 localhost4.localdomain4
10.10.199.100 ose-mstr01 ose-mstr01.f5.local
10.10.199.101 ose-node01 ose-node01.f5.local
10.10.199.102 ose-node02 ose-node02.f5.local
- On ose-mstr01, we created some ssh keys for user that we copied on all the nodes. This way you can use ose-mstr01 as needed to connect to all nodes without authentication if wanting to jump around using ssh i.e. SSH root@10.10.199.101 from ose-mstr01
Step 2: Access the master using the mRemoteNG client from the Win7 Jump box (there is a shortcut in the taskbar). In the nRemoteNG client, Expand Connections > Agility2018 > OpenShiftenterprise > OSE-cluster. Here, you’ll have shortcuts to the different Openshift nodes (Master and nodes) and to your BIG-IPs.
- Master Mgmt IP: 10.10.199.100 root/default
- BIGIP01 – 10.10.200.98 root/default admin/admin
- BIGIP02 – 10.10.200.99 root/default admin/admin
Accessing OpenShift
OpenShift provides a web console that allow you to perform various tasks via a web browser. Additionally, you can utilize a command line tool to perform tasks. Let’s get started by logging into both of these and checking the status of the platform.
Step 3: Login to OpenShift master
Open a terminal on the master (click on ose-master in the mRemoteNG client) and login using the same URI/user/password with following command:
oc login https://ose-mstr01.f5.local:8443 --insecure-skip-tls-verify=true
Use the following username and password username: demouser password: demouser
[root@ose-mstr01 ~]# oc login https://ose-mstr01.f5.local:8443 --insecure-skip-tls-verify=true
Authentication required for https://ose-mstr01.f5.local:8443 (openshift)
Username: demouser
Password:
Login successful.

You have access to the following projects and can switch between them with 'oc project <projectname>':

   default
   f5demo
   guestbook
   kube-public
   kube-service-catalog
   * kube-system
   logging
   management-infra
   openshift
   openshift-infra
   openshift-node
   openshift-template-service-broker
   yelb

Using project "kube-system".
[root@ose-mstr01 ~]#
Step 4: Check the OpenShift status
The oc status command shows a high level overview of the project currently in use, with its components and their relationships, as shown in the following example:
[root@ose-mstr01 ~]# oc status
In project kube-system on server https://ose-mstr01.f5.local:8443

You have no services, deployment configs, or build configs.
Run 'oc new-app' to create an application.
[root@ose-mstr01 ~]#
Step 5: Check the OpenShift nodes
You can manage nodes in your instance using the CLI. The CLI interacts with node objects that are representations of actual node hosts. The master uses the information from node objects to validate nodes with health checks.
To list all nodes that are known to the master:
[root@ose-mstr01 ~]# oc get nodes
NAME                  STATUS                     AGE       VERSION
ose-mstr01.f5.local   Ready,SchedulingDisabled   24d       v1.7.6+a08f5eeb62
ose-node01            Ready                      24d       v1.7.6+a08f5eeb62
ose-node02            Ready                      24d       v1.7.6+a08f5eeb62
[root@ose-mstr01 ~]#
If the node status shows NotReady or SchedulingDisabled contact the lab proctor. The node is not passing the health checks performed from the master and Pods cannot be scheduled for placement on the node.
Note
“SchedulingDisabled” for the Master is normal.
To get more detailed information about a specific node, including the reason for the current condition use the oc describe node command. This does provide alot of very useful information and can assist with throubleshooting issues.
[root@ose-mstr01 ~]# oc describe node ose-mstr01.f5.local
Name:                   ose-mstr01.f5.local
Role:
Labels:                 beta.kubernetes.io/arch=amd64
                        beta.kubernetes.io/os=linux
                        kubernetes.io/hostname=ose-mstr01.f5.local
                        openshift-infra=apiserver
Annotations:            volumes.kubernetes.io/controller-managed-attach-detach=true
Taints:                 <none>
CreationTimestamp:      Fri, 22 Jun 2018 15:53:34 -0700
Conditions:
Type                  Status  LastHeartbeatTime                       LastTransitionTime                      Reason                               Message
----                  ------  -----------------                       ------------------                      ------                               -------
OutOfDisk             False   Tue, 17 Jul 2018 12:08:16 -0700         Fri, 22 Jun 2018 15:53:34 -0700              KubeletHasSufficientDisk        kubelet has sufficient disk space available
MemoryPressure        False   Tue, 17 Jul 2018 12:08:16 -0700         Fri, 22 Jun 2018 15:53:34 -0700         KubeletHasSufficientMemory      kubelet has sufficient memory available
DiskPressure          False   Tue, 17 Jul 2018 12:08:16 -0700         Fri, 22 Jun 2018 15:53:34 -0700         KubeletHasNoDiskPressure        kubelet has no disk pressure
Ready                 True    Tue, 17 Jul 2018 12:08:16 -0700         Tue, 17 Jul 2018 11:07:28 -0700           KubeletReady                    kubelet is posting ready status
Addresses:
InternalIP:   10.10.199.100
Hostname:     ose-mstr01.f5.local
Capacity:
cpu:           4
memory:        16266916Ki
pods:          40
Allocatable:
cpu:           4
memory:        16164516Ki
pods:          40
System Info:
Machine ID:                    8bd4148d1a6249a7bca6e753d64862b3
System UUID:                   564DADCC-A795-99FC-F2EA-24AFEAD600C3
Boot ID:                       16b282b5-5ee0-4e1a-be6a-b8e1e2ae2449
Kernel Version:                3.10.0-862.3.3.el7.x86_64
OS Image:                      OpenShift Enterprise
Operating System:              linux
Architecture:                  amd64
Container Runtime Version:     docker://1.13.1
Kubelet Version:               v1.7.6+a08f5eeb62
Kube-Proxy Version:            v1.7.6+a08f5eeb62
ExternalID:                     ose-mstr01.f5.local
Non-terminated Pods:            (2 in total)
Namespace                     Name                                    CPU Requests    CPU Limits      Memory Requests       Memory Limits
---------                     ----                                    ------------    ----------      ---------------       -------------
kube-service-catalog          apiserver-56t4l                         0 (0%)          0 (0%)          0 (0%)                 0 (0%)
kube-service-catalog          controller-manager-m2mbt                0 (0%)          0 (0%)          0 (0%)                 0 (0%)
Allocated resources:
(Total limits may be over 100 percent, i.e., overcommitted.)
CPU Requests  CPU Limits      Memory Requests Memory Limits
------------  ----------      --------------- -------------
0 (0%)        0 (0%)          0 (0%)          0 (0%)
Events:
FirstSeen     LastSeen        Count   From                            SubObjectPath   Type            Reason                 Message
---------     --------        -----   ----                            -------------   --------        ------                 -------
1h            1h              1       kubelet, ose-mstr01.f5.local                    Normal                NodeAllocatableEnforced Updated Node Allocatable limit across pods
1h            1h              1       kubelet, ose-mstr01.f5.local                    Normal          Starting                Starting kubelet.
1h            1h              1       kubelet, ose-mstr01.f5.local                    Normal          NodeHasSufficientDisk   Node ose-mstr01.f5.local status is now: NodeHasSufficientDisk
1h            1h              1       kubelet, ose-mstr01.f5.local                    Normal          NodeHasSufficientMemory Node ose-mstr01.f5.local status is now: NodeHasSufficientMemory
1h            1h              1       kubelet, ose-mstr01.f5.local                    Normal          NodeHasNoDiskPressure   Node ose-mstr01.f5.local status is now: NodeHasNoDiskPressure
1h            1h              1       kubelet, ose-mstr01.f5.local                    Warning         Rebooted                Node ose-mstr01.f5.local has been rebooted, boot id: 16b282b5-5ee0-4e1a-be6a-b8e1e2ae2449
1h            1h              1       kubelet, ose-mstr01.f5.local                    Normal          NodeNotReady            Node ose-mstr01.f5.local status is now: NodeNotReady
1h            1h              1       kubelet, ose-mstr01.f5.local                    Normal          NodeNotSchedulable      Node ose-mstr01.f5.local status is now: NodeNotSchedulable
1h            1h              1       kubelet, ose-mstr01.f5.local                    Normal          NodeReady               Node ose-mstr01.f5.local status is now: NodeReady
[root@ose-mstr01 ~]#
Step 6: Check to see what projects you have access to:
[root@ose-mstr01 ~]# oc get projects
NAME                                DISPLAY NAME   STATUS
default                                            Active
f5demo                                             Active
guestbook                                          Active
kube-public                                        Active
kube-service-catalog                               Active
kube-system                                        Active
logging                                            Active
management-infra                                   Active
openshift                                          Active
openshift-infra                                    Active
openshift-node                                     Active
openshift-template-service-broker                  Active
yelb                                               Active
You will be using these projects in the lab
Step 7: Check to see what host subnests are created on OpenShift:
[root@ose-mstr01 ~]# oc get hostsubnets
NAME                  HOST                  HOST IP         SUBNET          EGRESS IPS
ose-mstr01.f5.local   ose-mstr01.f5.local   10.10.199.100   10.130.0.0/23   []
ose-node01            ose-node01            10.10.199.101   10.128.0.0/23   []
ose-node02            ose-node02            10.10.199.102   10.129.0.0/23   []
[root@ose-mstr01 ~]#
Step 8: Access OpenShift web console
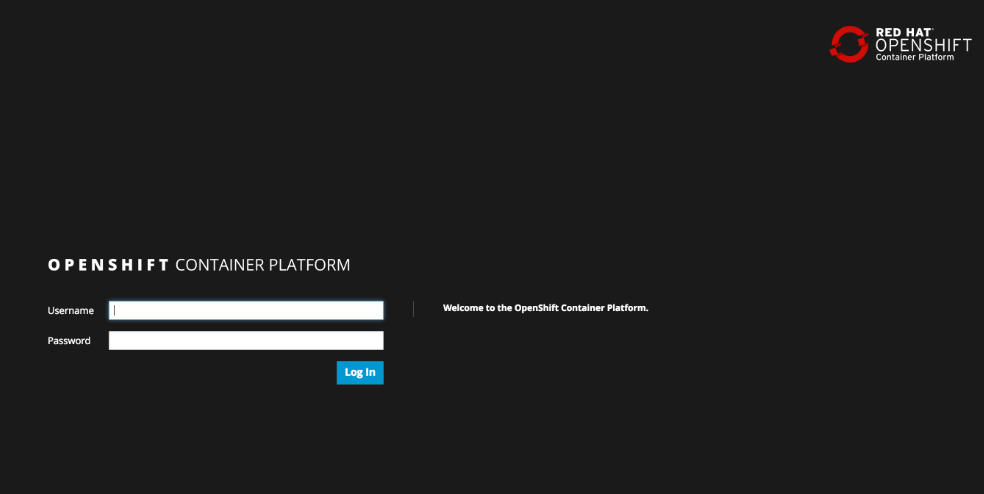
From the jumpbox navigate to the URI provided by your instructor and login with the user/password provided (there is a favorite on chrome called Login - OpenShift Container Platform).
Use the following username and password username: demouser password: demouser
Troubleshooting OpenShift!
If you have a problem in your OpenShift Container Platform 3 environment, how do you investigate
- How can I troubleshoot it?
- What logs can I inspect?
- How can I modify the log level / detail that openshift generates?
- I need to provide supporting data to technical support for analysis. What information is needed?
A starting point for data collection from an OpenShift master or node is a sosreport that includes docker and OpenShift related information. The process to collect a sosreport is the same as with any other Red Hat Enterprise Linux (RHEL) based system:
Note
The following is provided for informational purposes. You do not need to run these commands for the lab.
# yum update sos
# sosreport
Openshift has five log message severities. Messages with FATAL, ERROR, WARNING and some INFO severities appear in the logs regardless of the log configuration.
0 - Errors and warnings only
2 - Normal information
4 - Debugging-level information
6 - API-level debugging information (request / response)
8 - Body-level API debugging information
This parameter can be set in the OPTIONS for the relevant services environment file within /etc/sysconfig/
For example to set OpenShift master’s log level to debug, add or edit this line in /etc/sysconfig/atomic-openshift-master
OPTIONS='--loglevel=4'

and then restart the service with

systemctl restart atomic-openshift-master
Key files / directories
/etc/origin/{node,master}/
/etc/origin/{node,master}/{node.master}-config.yaml