Lab 3.1 - F5 Container Connector Setup
The BIG-IP Controller for Kubernetes installs as a Deployment object
See also
The official CC documentation is here: Install the BIG-IP Controller: Kubernetes
BIG-IP Setup
To use F5 Container connector, you’ll need a BIG-IP up and running first.
Through the Jumpbox, you should have a BIG-IP available at the following URL: https://10.1.1.245
Warning
Connect to your BIG-IP and check it is active and licensed. Its login and password are: admin/admin
If your BIG-IP has no license or its license expired, renew the license. You just need a LTM VE license for this lab. No specific add-ons are required (ask a lab instructor for eval licenses if your license has expired)
You need to setup a partition that will be used by F5 Container Connector.
# From the CLI:
tmsh create auth partition kubernetes

# From the UI:
GoTo System --> Users --> Partition List
- Create a new partition called "kubernetes" (use default settings)
- Click Finished
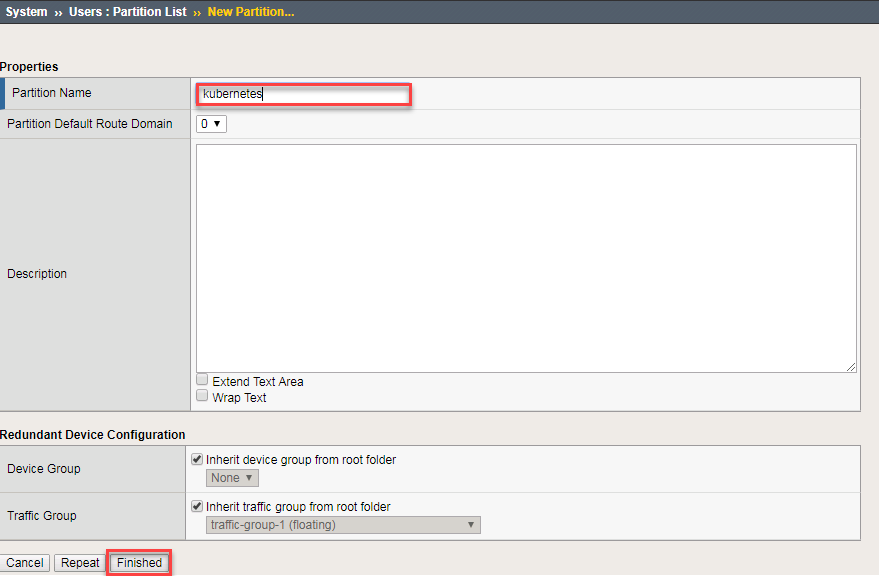
With the new partition created, we can go back to Kubernetes to setup the F5 Container connector.
Container Connector Deployment
See also
For a more thorough explanation of all the settings and options see F5 Container Connector - Kubernetes
Now that BIG-IP is licensed and prepped with the “kubernetes” partition, we need to define a Kubernetes deployment and create a Kubernetes secret to hide our bigip credentials.
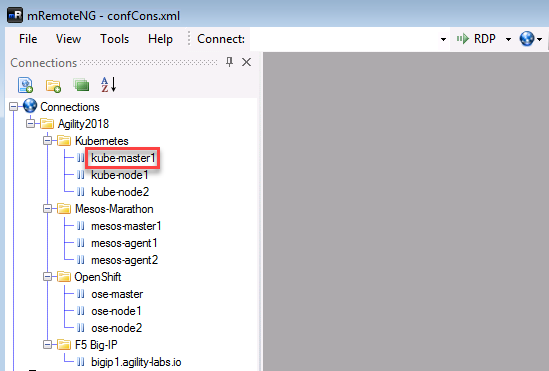
From the jumpbox open mRemoteNG and start a session with Kube-master.
Tip
- These sessions should be running from the previous lab.
- As a reminder we’re utilizing a wrapper called MRemoteNG for Putty and other services. MRNG hold credentials and allows for multiple protocols(i.e. SSH, RDP, etc.), makes jumping in and out of SSH connections easier.
On your desktop select MRemoteNG, once launched you’ll see a few tabs similar to the example below. Open up the Kubernetes / Kubernetes-Cluster folder and double click kube-master1.
“git” the demo files
Note
These files should be here by default, if NOT run the following commands.
git clone https://github.com/f5devcentral/f5-agility-labs-containers.git ~/agilitydocs

cd ~/agilitydocs/kubernetes
Create bigip login secret
kubectl create secret generic bigip-login -n kube-system --from-literal=username=admin --from-literal=password=admin
You should see something similar to this:

Create kubernetes service account for bigip controller
kubectl create serviceaccount k8s-bigip-ctlr -n kube-system
You should see something similar to this:

Create cluster role for bigip service account (admin rights, but can be modified for your environment)
kubectl create clusterrolebinding k8s-bigip-ctlr-clusteradmin --clusterrole=cluster-admin --serviceaccount=kube-system:k8s-bigip-ctlr
You should see something similar to this:

At this point we have two deployment mode options, Nodeport or Cluster. For more information see BIG-IP Controller Modes
Important
This lab will focus on Nodeport. In Class 4 Openshift we’ll use ClusterIP.
Nodeport mode
f5-nodeport-deployment.yamlNote
- For your convenience the file can be found in /home/ubuntu/agilitydocs/kubernetes (downloaded earlier in the clone git repo step).
- Or you can cut and paste the file below and create your own file.
- If you have issues with your yaml and syntax (indentation MATTERS), you can try to use an online parser to help you : Yaml parser
 1
 2
 3
 4
 5
 6
 7
 8
 9
10
11
12
13
14
15
16
17
18
19
20
21
22
23
24
25
26
27
28
29
30
31
32
33
34
35
36
37
38
apiVersion: extensions/v1beta1
kind: Deployment
metadata:
  name: k8s-bigip-ctlr-deployment
  namespace: kube-system
spec:
  replicas: 1
  template:
    metadata:
      name: k8s-bigip-ctlr
      labels:
        app: k8s-bigip-ctlr
    spec:
      serviceAccountName: k8s-bigip-ctlr
      containers:
        - name: k8s-bigip-ctlr
          image: "f5networks/k8s-bigip-ctlr:latest"
          imagePullPolicy: IfNotPresent
          env:
            - name: BIGIP_USERNAME
              valueFrom:
                secretKeyRef:
                  name: bigip-login
                  key: username
            - name: BIGIP_PASSWORD
              valueFrom:
                secretKeyRef:
                  name: bigip-login
                  key: password
          command: ["/app/bin/k8s-bigip-ctlr"]
          args: [
            "--bigip-username=$(BIGIP_USERNAME)",
            "--bigip-password=$(BIGIP_PASSWORD)",
            "--bigip-url=10.1.10.60",
            "--bigip-partition=kubernetes",
            "--namespace=default",
            "--pool-member-type=nodeport"
            ]
Once you have your yaml file setup, you can try to launch your deployment. It will start our f5-k8s-controller container on one of our nodes (may take around 30sec to be in a running state):
kubectl create -f f5-nodeport-deployment.yaml
Verify the deployment “deployed”
kubectl get deployment k8s-bigip-ctlr-deployment --namespace kube-system

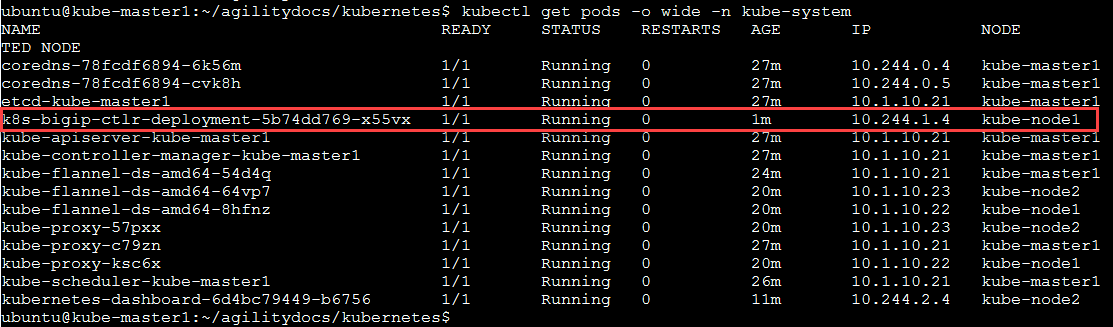
To locate on which node the container connector is running, you can use the following command:
kubectl get pods -o wide -n kube-system
We can see that our container is running on kube-node2 below.
Troubleshooting
If you need to troubleshoot your container, you have two different ways to check the logs of your container, kubectl command or docker command.
Using kubectl command: you need to use the full name of your pod as showed in the previous image
# For example:
kubectl logs k8s-bigip-ctlr-deployment-5b74dd769-x55vx -n kube-system
Using docker logs command: From the previous check we know the container is running on kube-node1. Via mRemoteNG open a session to kube-node1 and run the following commands:
sudo docker ps
Here we can see our container ID is “01a7517b50c5”

Now we can check our container logs:
sudo docker logs 01a7517b50c5

Note
The log messages here are identical to the log messages displayed in the previous kubectl logs command.
You can connect to your container with kubectl as well:
kubectl exec -it k8s-bigip-ctlr-deployment-79fcf97bcc-48qs7 -n kube-system  -- /bin/sh

cd /app

ls -la

exit